How the Needle or Te Rua Manga came to be.
The island of Rarotonga blasted through the ocean surface about
2 million years ago, and eruptions continued until the island was
nearly 1500 metres high. About 1.5 million years ago, the centre of
the volcano collapsed to form a large basin or caldera. Eventually
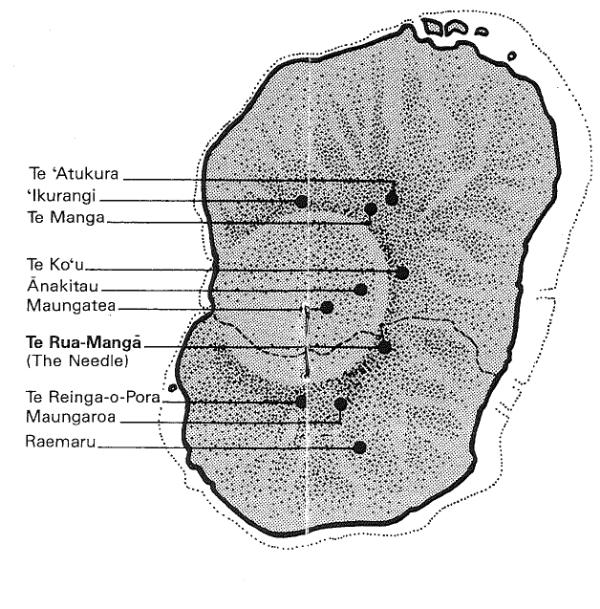
the northern rim of the caldera slipped into the sea to form a U
shaped basin, outlined by the peaks of Te Reinga-o-Pora, Maungaroa,
Te Ko’u, Te Manga and ‘Ikurangi as shown on the map below.
During the collapse the rim of the caldera developed cracks
which became filled with volcanic ash and rocks.
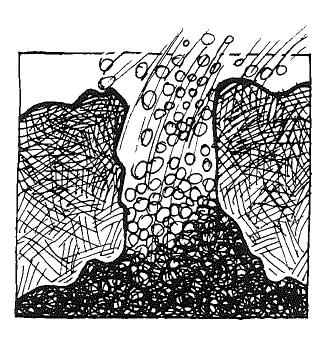
In the case of the Needle (Te Rua-Manga), this loose material
was later welded into a tough breccia (pronounced Bre-she-a), by
molten rock that oozed in from below.

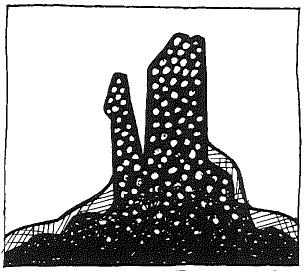
Finally, a million years of erosion has removed the less
resistant material to leave the breccia pinnacles, such as Te
Rua-Manga.
Visiting it today
There are a couple of ways to get to visit the Needle, both
require a modicum of fitness and both follow the same trail to
physically get there.
Method 1.
Several companies and individuals operate walking tours that
complete the cross island walk. One well known and advertised tour
apparently offers a rundown of the islands fauna and flora as you
complete the walk, and you are likely to be travelling with several
other like minded people. This method obviously means you can use
the tour company’s knowledge to navigate the path.
Method 2.
Should you wish to navigate your own way to the Needle, then
load the waypoints listed below into your GPS, choose a suitable
day, provision yourself appropriately for the terrain and prepare
yourself for a treat. The trail over the island is NOT well
marked. If you are expecting a well trodden and obvious path,
regular little ‘road signs’ telling you about options you could
take or billboards explaining the views in front of you at a
particular point, then you will be disappointed. People who are
expecting any of these should take about $60 from their wallet and
see Method 1 above.
Choose the right day for this. If it’s cloudy in the tops, the
view won’t be all it could be – and sadly it is often murky
looking. I would suggest you take the first suitable day that comes
along, Murphy's law says if you let one slip by, it will be the
only one till the day AFTER you leave. If it’s going to rain, or
likely to rain or has recently rained, then snorkelling might be a
better option, as I imagine a few grazed knees would be the outcome
of walking the trail when it’s slippery. The trail is steep and the
footing is unstable in places. You WILL need decent shoes or
tramping boots. I completed the walk in sneakers, but to be honest
I would have felt happier if I had my boots on. You will need
enough food and water for 3 or 4 hours walking, although there is
plenty of water in the Papua stream as you complete the last bit. I
didn’t get bitten, but insect repellent might be useful. There is
plenty of tree cover, but sunscreen and a hat would be sensible.
Lastly, tell someone else about your plans. There is no cellphone
coverage over the route.
Catch a bus or cadge a ride to waypoint 1. A bus driver will
happily tell you where to get off and point out the way. The walk
up Uruau Drive to the start of the trail proper will take you past
the diesel generation plant, through taro plantations, past hot
looking cattle, within a metre of the traditional cache GZ1EQ4 to a
parking area at the top. Here is where you start the real walk.
The trail starts of the right of the stream, heads up a hill and
looks very much like a driveway to some of the local houses. You
may see green bands around tree trunks; these are the only trails
markers you are likely to see during the trek. Follow the trail to
an open area near the public water intake on the Avatiu Stream. At
the end of the grassy opening you will get to the trail which
follows the Avatiu Stream for a short distance. The trail then
crosses the stream and you will come to a huge boulder with strange
patterning on it. (This is a likely earthcache site in itself if
someone feels keen). Stay just to the right of the boulder and the
path begins a sharp ascent up a 'staircase' of tree roots. You will
need hands and feet here, it’s steep! The person in the front of
the party (assuming you are not alone) will see hundreds of little
geckoes scuttling out of you way as you clamber up the root wall.
Another boulder (this one is split open) in the middle of the trail
is where you will first glimpe the Needle through the trees.
As you approach the Needle you will reach an intersection in the
trail at waypoint 2. The North path is the one you just walked up
from Avarua and it’s possible to reverse the trail directions and
go back that way. The East Path is a possible way out to the South
coast, via a steep decent but manageable into the Papua valley.
It’s also a good trail to follow for a little while to the top of
the first hill at waypoint 3 to get a view and great photos back to
the needle itself. The South-East path is the route out which most
people take and is described later. The West path will take you to
the Needle via a 10 min walk.
Logging your find
To log the cache you will need to complete the following tasks,
after enjoying the wonderful views.
1) Tell me via email the difference in altitude between the
trail intersection at waypoint 2, and the point where you can first
touch the needle. All GPS can tell you the GPS elevation if yours
doesn’t have a barometer in it.
2) The Needle has small sign on its flank. Either quote it or
tell me the jist of its meaning.
3) Near the above sign is an aid for those folk brave enough to
climb up the needle itself. What is this aid device and what side
of the needle is it on?
Don’t log these answers please, email them to me, then go ahead
and log your find along with your comments on the views and how you
found the trip. I will delete logs of those that don’t email me
answers within a few days of logging a find – sounds harsh, but
those are the rules.
Getting Out..
When you head down to the intersection, follow the southerly
trail - which will take you down to the south side of the island
along the Papua Stream. A fat white pipe (which is actually the
power feed from the diesel plant to the south side of the island)
follows the trail for the first part of the journey. About 20
minutes later, you will reach another fork in the trail at waypoint
4 by a large tree on your left hand side. Turning left here down
the hill toward the East is the way home for us, although I am told
you can get out to the south side of the island via a nasty steep
rock slope by continuing straight ahead following the power cable.
Lets not….
After a scramble down the hill, the trail criss-crosses the
Papua stream several times as you rock-hop your way downstream
toward the Wigmore Waterfall at waypoint 5. The trail is easy to
misplace here in places, just keep looking for the green bands on
the trees. You have earned that rest and a dip now, but the sign
says don’t swim in the water intake above the falls. The pool below
the falls looks much more inviting to me anyway. The trail from
Wigmore's Waterfall to the end on the south side is on sealed road
that runs past farmland of bananas and the abandoned Sheraton hotel
complex.
Well done, and I trust you get the same sense of achievement I
did as you pat yourself on the back – that walk and the visit to
the Needle was a highlight of my time in that beautiful
country.